


Sketching is the foundation of drawing. It reflects the artist’s identity, style, and perspective — with colour being a complementary element rather than the core. Drawing a lion is a very interesting and funny activity for both beginners and experts. Whether you’re doing it as a hobby, a school project, or to enhance your drawing skills, this article will introduce the basics of how to draw a lion. Furthermore, in this article, we will discuss the key steps to draw a realistic lion and tips for improving your drawings.
Reasons for drawing a lion
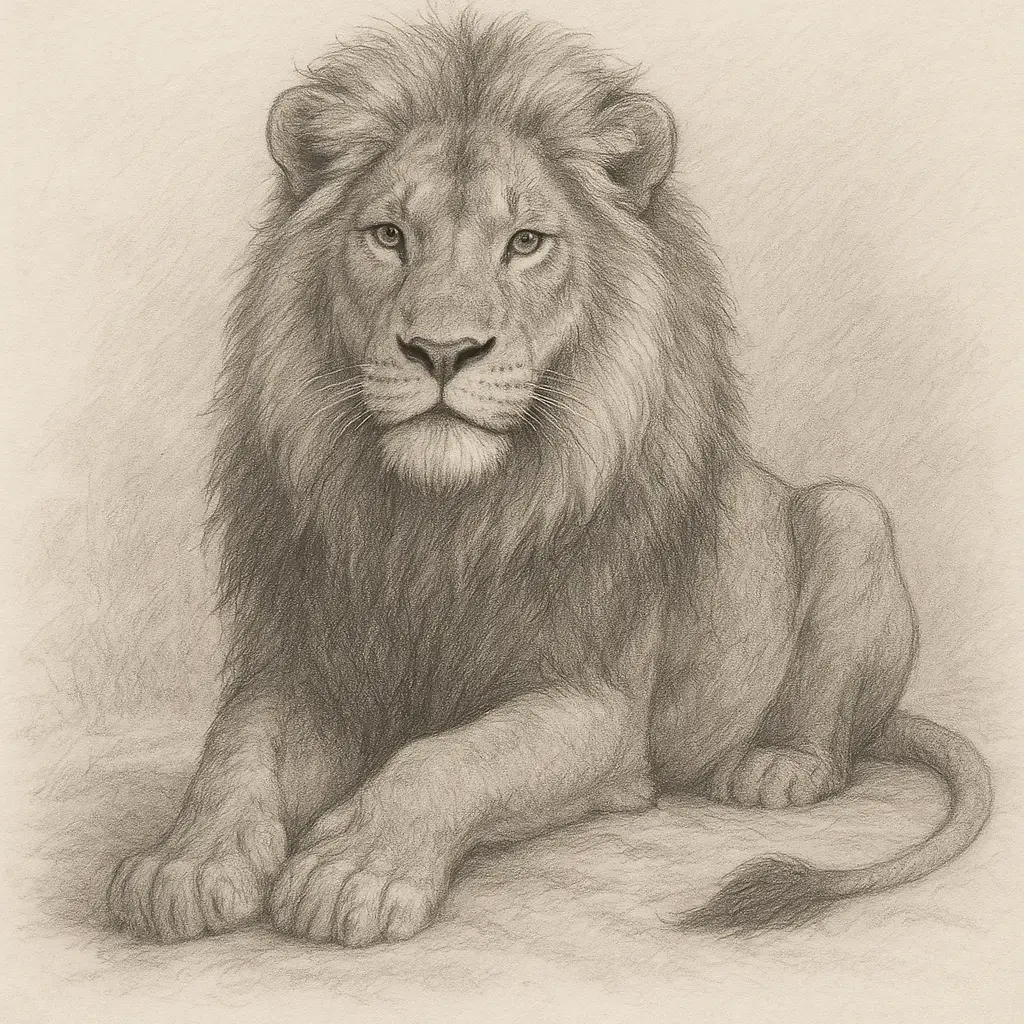
The lion is often referred to as the King of the Jungle. The lion is often drawn as a symbol of power, resolution, and dignity. It is both challenging and rewarding to draw distinctive features such as the mane of a lion, its great eyes and its muscular build in a drawing. You can improve your skills in anatomy, proportion, and shading by drawing a lion.
How to draw a lion?
Here is a step-by-step description of drawing a lion:
1. Collect the materials
Before getting started, make sure you have the following:
- Pencils: Pencil is the main thing required for drawing. A Variety of pencils from 2H (for light lines) to 6B (for bold shading) is used in sketching and shading.
- Paper or sketchbook: Drawing will be made on paper, therefore always select a smooth drawing paper so that pencils move easily on them. Select a high-quality drawing paper on which shading can be handled easily.
- Erasers: You can use a soft eraser, a kneadable eraser, or a Tombow Mono eraser for this purpose. A putty eraser can help with highlights while the regular erasers will assist you to clean up the unwanted lines.
- Sharpener: Sharpener is used to shape the lead of the pencils. A sharp pencil will draw clean and fresh lines.
- Optional: You can use coloured pencils, charcoal, or pastels for added depth and texture.
2. Start with a basic shape
Begin with breaking down the complex structure of a lion into simple and easily manageable shapes. At the start sketch the following structures:
- Head: Sketch a big oval for making the lion’s head.
- Body: Next, create a slightly stretched oval shape for the body. Place it directly underneath the head.
- Guidelines: For making the facial features like mouth, nose, and eyes, faintly sketch the vertical and horizontal lines.
3. Draw the face of a lion
Now draw the features of a lion:
- Eyes: Sketch two eyes along the horizontal guideline. The eye should have an almond-like contour. Ensure that the eyes are symmetrical.
- Nose: Just under the centre of the face draw a triangle-like shape to represent the nose. The nose is wide and smooth.
- Mouth: For making the mouth, sketch a twisted line below the nose. Add extra details to define the mouth.
- Ears: Choose the location of ears as the top of the head. Draw the ears as circular, slightly tilted, and positioned near the sides of the head.
- Jawline: Sketch the jawline and neck muscles to make a more designated shape of the lion’s face. This part is important to make the drawing more attractive because lions have powerful jawlines.
4. Draw the legs and tail
Next, draw the lower part of the lion’s body.
- Legs: At the start, draw simple lines for the legs. Then improve them into the shape of the muscles. The legs of the lion should have a strong and solid look because lions have muscular and strong legs. Make sure the position of the legs is made correctly to give the lion a unique posture.
- Tail: Create a sweeping curve extending from the rear of the figure. Add a tuft at the end. The tail of the lion should be lengthy and slim with a cluster of fur at the end.
5. Sketch detail and texture
Now add details to your sketch because the basic outlines have been in place:
- Mane texture: Draw short and spiky lines following the mane curve to add texture to the mane. Layer these lines to add depth to make the lion’s make full and thick.
- Facial features: For adding depth to the mouth, nose, and eyes take help from the shading. Focus on making eloquent eyes to give a realistic look. Make sure that the mouth has powerful clarity and the outlines of the nose should be shaded in a proper way.
- Detail of fur: Sketch a fur texture beside the body, legs and tail. Use quick, small pencil strokes to create dense, short fur.
6. Shading and final touches
Shade your lion to add a sense of originality and depth to your drawing. Follow the following tips for shading the lion:
- Source of light: Check the light source. Observe the direction of the light source in the drawing. Now examine and shade the areas that are in shadow naturally. Make the mane, inner parts of the legs, and underside of the body more dark.
- Use different categories of pencils: Use lighter pencils (2H, 4H) if you want to do soft shading. Pencils like 4B, and 6B are used for dark shading and forming rich shadows and depth. Layer the shading to add texture.
- Blending and smooth: Gently blend the shading. Use a blending stump and tissue for this purpose. Blend especially around the mane and face to give the lion’s fur a more natural look.
7. Review and elaborate
This is the final step. Now step back and judge the drawing. Carefully check everything and see if any area requires clarification. If needed add any extra details. If you think that any line or guideline is unnecessary, erase it. Finally, clean up and tidy your lion drawing.
Tips for improving drawing skills
Here are some tips for improving the sketching skills:
- Practice with references: Always use the original and clear picture of the thing that you are going to draw as a reference. This will help you to understand the real features and structure of the thing.
- Focus on structure: During drawing focus on the structure of the picture to make the drawing more accurate.
- Experiment with different styles: Once you are acknowledged of the basics of drawing, try to sketch the drawings with different styles. You can experiment with a more cartoonish and conceptual outlook for a different look at the drawings.
Why do Australians love lion drawing?
For Australians, the drawing of the lion is not just a hobby but it is a source to connect with the beauty of nature, wildlife, and the nature of animals. Drawing the majesty of the lion is a satisfying experience whether you are a student, or drawing a lion just as a hobby. Furthermore, the lion frequently features in Australian pop culture.
Conclusion
This article explained how to draw a lion and provided tips to improve your sketching skills. You can make a beautiful lion drawing with the help of the correct tools, the right steps, and patience. The lion drawing made in this way would display its beauty and power. Make sure that more practice will give you more confidence to draw such incredible sketches. So, seize your pencil and start to draw the king of the jungle.