


Originally a common element in many DIY projects and used in various applications, including bathroom and kitchen connections, silicone is a versatile material utilized in numerous settings. However, over time, wear and tear, restoration work, or simply poorly applied silicone may require you to remove it. If you’re looking for a natural approach on how to remove silicone, this task could seem daunting. But don’t worry, this article will provide you with thorough, specific instructions on how to naturally, precisely, and effectively remove silicone, creating a smooth and clean surface.
Why would you need to remove silicone?
Mostly thought of as a sealant, silicone is a flexible and strong material. Still, it should be taken out and replaced since it can start to peel off, grow mouldy or discoloured:
- Renovation Projects: Usually eliminating old silicone from your kitchen or bathroom opens a space for new usage.
- Incorrect Application: Should the silicone be put either too thickly or unevenly, it should be removed since it may not seal sufficiently.
- Mould Growth: Sometimes silicone causes mould in humid environments, especially bathrooms; this is difficult to remove and typically requires for complete eradication.
Tools you’ll need
Make sure your tools are right before you start ruining silicone:
- Utility Knife or Razor Blade: Cut silicone using either a utility knife or razor blade.
- Silicone Sealant Remover: Silicon sealant remover is a chemical treatment softening silicone for simple removal.
- Plastic Scraper or Spatula: Remove silicone very gently using a plastic scraper or spatula to avoid damage to any surfaces.
- Paper Towels or Cloths: Rags or paper towels will help you handle any leftovers.
- Methylated Spirits or Vinegar: Remove the silicone then use vinegar or methylated spirits to clean the surface.
- Protective Gloves: Protective gloves safeguard your hands from dangerous tools and substances.
Step-by-Step Guide to Removing Silicone
1. Prepare the area
Look for first dryness and purity in the surroundings. Eliminate all possible influencing factors, especially obstacles.
2. Cut away excess silicone
Edge the silicone somewhat with a utility knife or razor blade. Try not to destroy the surface; you want it as nearly perfect as you can.
3. Apply silicone sealant remover
It’s time to remove the silicone sealant once you have cut through as much silicone as the knife lets. Treat any last silicone liberally with the remover.
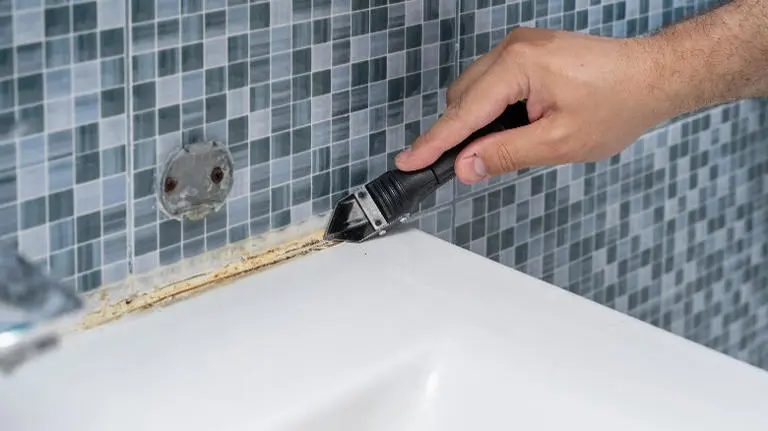
4. Scrape Off the Softened Silicone
Using a plastic scraper or spatula, gently scrape away the softened silicone once the sealant remover has started to show action. Start with one edge to minimise silicone loss working your way around the surface.
5. Clean the Surface
There will most definitely be some surface residual impact once you remove the silicone. Completely clean the area with a towel soaked in vinegar or methylated spirits.
6. Inspect and Repeat if Necessary
Check the space closely once it is perfect. Should you come over any extra silicone, come back and follow the removal guidelines.
Tips for a Smooth Silicone Removal Process
- Work Slowly and Carefully: Work deliberately and attentively, slow and careful. Hurrying the procedure could cause inadequate irritability or removal. Give some time to get the best results.
- Use the Right Tools: One should make use of the suitable instruments. Generally speaking, a metal scraper damages less surface than a plastic one. Always pick instruments suitable for the work.
- Ventilate the Area: Create the floor-based tunnel of airflow inside a space. Use chemical removers in a well-ventilated area to prevent fumes for breathing.
- Wear Protective Gear: Obtain some protective gear for yourself. Gloves shields your skin from dangerous chemicals and sharp tools.
How to Prevent Mould Growth on Silicone
Update your kitchen or bathroom with fresh silicone applied in a mix resistant to mould:
- Use Mould-Resistant Silicone: Check the airflow to be sufficient using Mould-Resistant Silicone.
- Ensure Proper Ventilation: Make sure your kitchen or bathroom has enough ventilation particularly during cooking or following a shower.
- Regular Cleaning: Frequent silicone washing in water and a light detergent helps to prevent dirt and grime accumulation.
Conclusion
Although removing silicone seems challenging, with the right equipment and methods it can be done fast and properly. This article provides all the information you need to remove silicone like a pro, whether you’re tackling a home renovation or dealing with mould issues..
Whether you prefer doing-it-yourself projects or are an Australian housewife, these ideas will ensure that your house improvement projects proceed without a hitch and seamlessly.